A Guide to Installing CoreOS (now Fedora CoreOS) on Proxmox
This guide walks through the process of installing Fedora CoreOS on a Proxmox virtual environment. Unlike traditional operating systems, CoreOS uses an immutable infrastructure model and is configured declaratively at first boot, which requires a specific setup process.
Step 1: Download the Fedora CoreOS Installer
The first step is to get the latest stable installer image.
- Navigate to the Fedora CoreOS download page.
- Select the
x86_64architecture. - Download the
ISOinstaller file. This is a live environment that we’ll use to perform the installation.
Step 2: Upload the ISO to Proxmox
With the installer downloaded, the next step is to make it available within Proxmox.
- Access your Proxmox node’s storage via the web interface.
- Upload the
.ISOfile you downloaded to your chosen storage location (e.g.,localstorage).
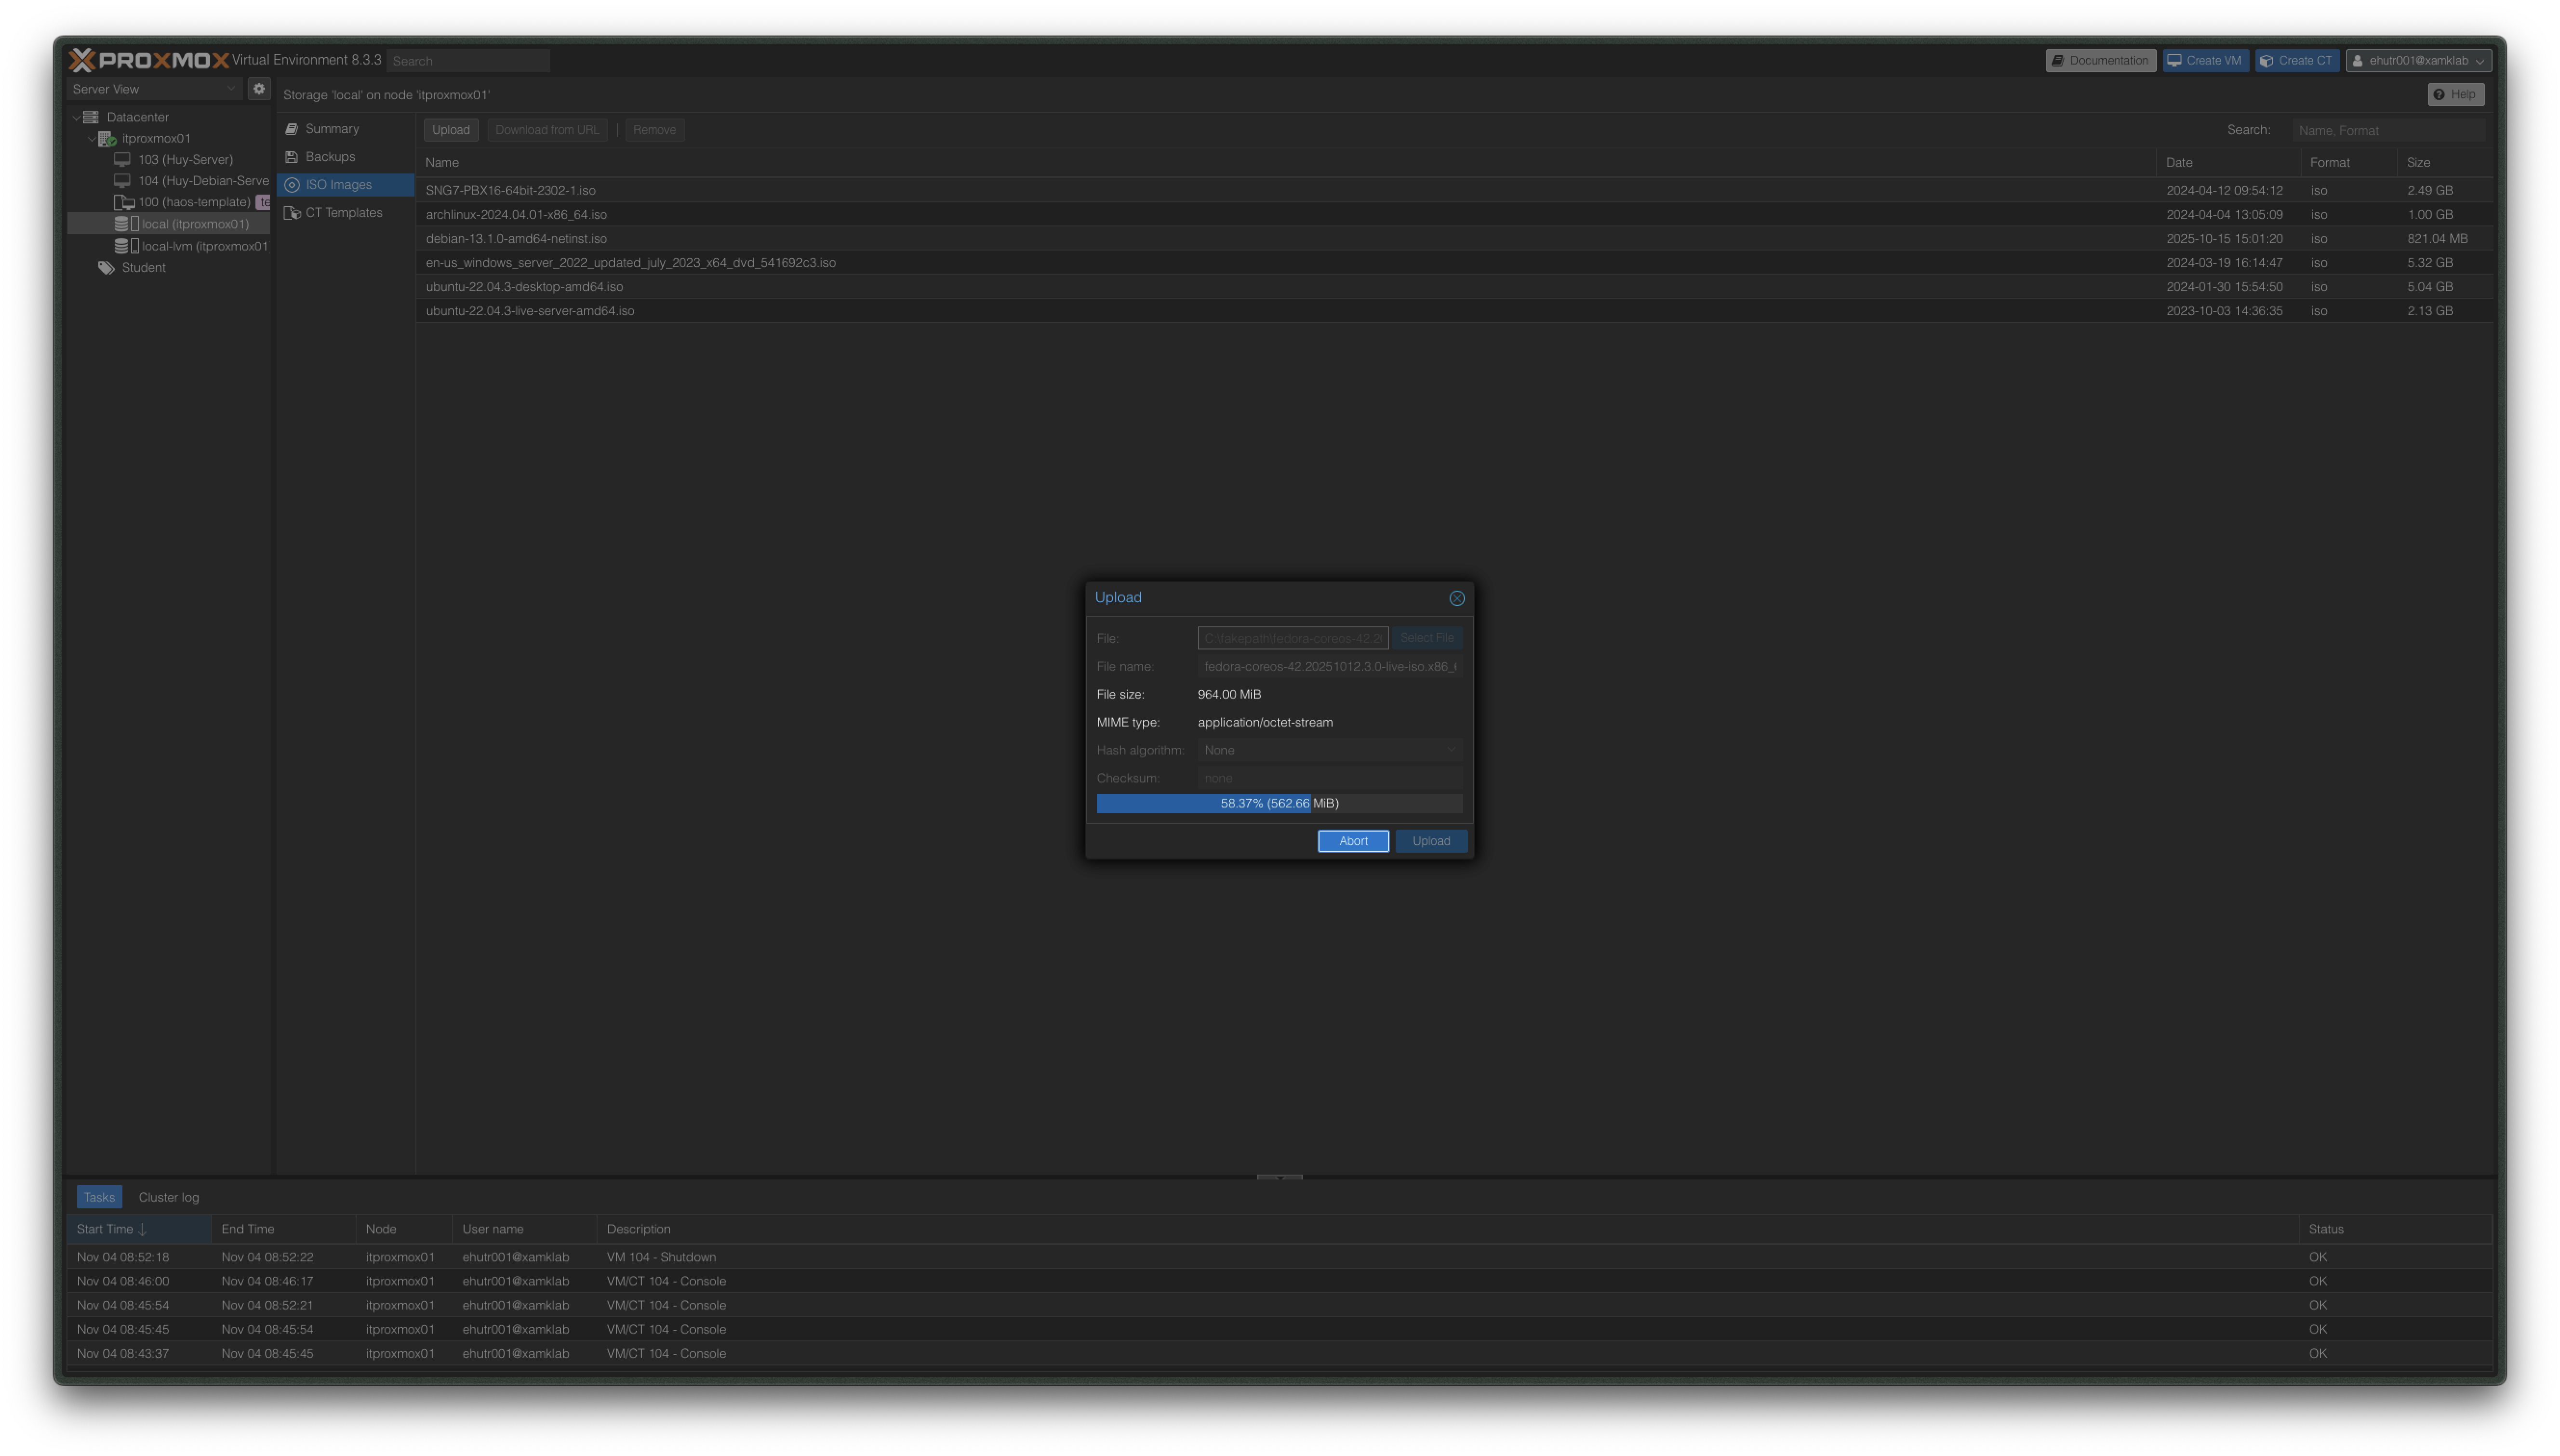
The Fedora CoreOS installer ISO successfully uploaded and ready to be used by a VM.
Step 3: Create and Configure the Virtual Machine
Create a new virtual machine in Proxmox with your desired specifications (CPU, Memory, Disk Space). The key step is to attach the CoreOS ISO you just uploaded as the CD/DVD drive. Once you start the VM, it will boot into the live environment, ready for installation.
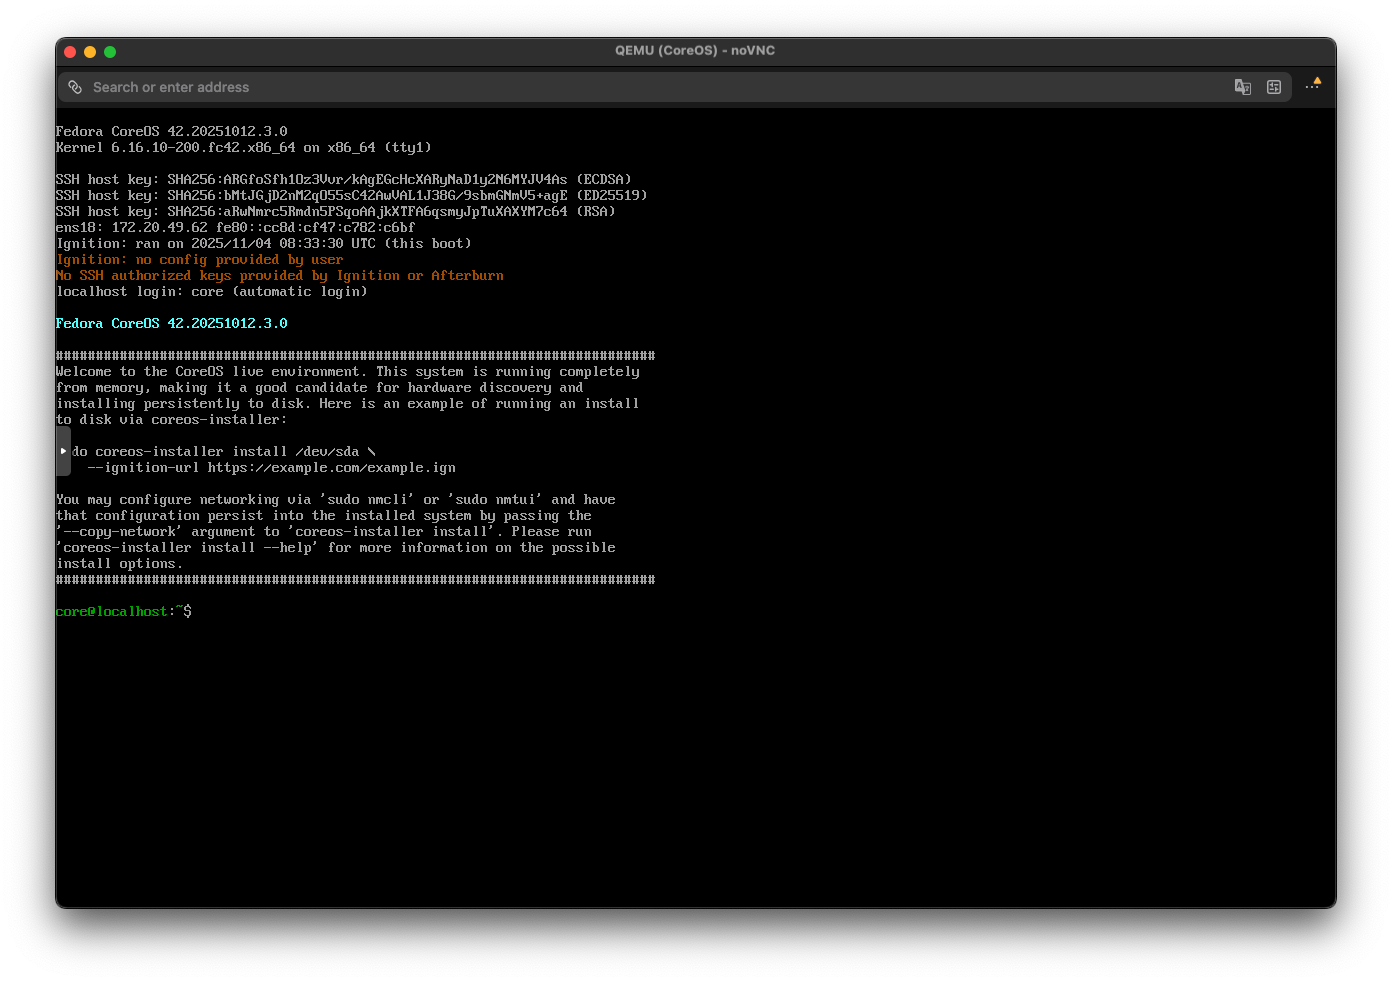
The VM has successfully booted into the Fedora CoreOS live environment, awaiting further instructions.
Step 4: Create the Ignition Configuration File
CoreOS does not use a manual installation process or a root password. Instead, all configuration is provided through an Ignition file. This JSON file defines users, systemd units, files, and other settings. To make it easier to write, we first create a YAML file (using the Butane spec) and then convert it.
The Butane config (config.bu) below performs several key setup tasks:
- Creates a user named
coreand authorizes an SSH key for secure, password-less login. - Adds the
coreuser to thesudoanddockergroups for administrative privileges. - Sets the hostname and disables automatic Zincati updates for stability.
- Ensures the ZFS kernel module is loaded, which is often needed on Proxmox.
- Automatically rebases the system to
ucore-minimal, a community-built image based on CoreOS with ZFS support. - Enables the Docker socket for container management.
variant: fcos
version: 1.6.0
passwd:
  users:
    - name: core
      ssh_authorized_keys:
        - ssh-ed25519 <KEY HERE>
      groups:
        - wheel
        - sudo
        - docker

storage:
  files:
    - path: /etc/hostname
      mode: 0644
      contents:
        inline: derp
    - path: /etc/zincati/config.d/90-disable-auto-updates.toml
      mode: 0644
      contents:
        inline: |
          [updates]
          enabled = false
    - path: /etc/systemd/system/rpm-ostree-countme.timer.d/40-weekly.conf
      mode: 0644
      contents:
        inline: |
          [Timer]
          OnCalendar=weekly
    - path: /etc/modules-load.d/zfs.conf
      mode: 0644
      contents:
        inline: zfs

systemd:
  units:
    - name: rpm-ostree-rebase-to-ucore.service
      enabled: true
      contents: |
        [Unit]
        Description=Rebase to uCore
        Wants=network-online.target
        After=network-online.target
        Before=zincati.service
        ConditionPathExists=!/var/lib/rpm-ostree-rebase-to-ucore.stamp

        [Service]
        Type=oneshot
        RemainAfterExit=yes
        ExecStart=/usr/bin/rpm-ostree rebase --reboot ostree-unverified-registry:ghcr.io/ublue-os/ucore-minimal:stable-zfs
        ExecStart=/usr/bin/touch /var/lib/rpm-ostree-rebase-to-ucore.stamp

        [Install]
        WantedBy=multi-user.target
    - name: docker.socket
      enabled: true
      contents: |
        [Unit]
        Description=Docker Socket for the API
        PartOf=docker.service

        [Socket]
        ListenStream=/var/run/docker.sock
        SocketMode=0660
        SocketUser=root
        SocketGroup=docker

        [Install]
        WantedBy=sockets.target
    - name: zfs-load.service
      enabled: true
      contents: |
        [Unit]
        Description=Load ZFS kernel module
        DefaultDependencies=false
        After=systemd-modules-load.service
        Before=zfs-mount.service

        [Service]
        Type=oneshot
        RemainAfterExit=yes
        ExecStart=/usr/sbin/modprobe zfs

        [Install]
        WantedBy=sysinit.target
Step 5: Convert the Butane Config to an Ignition File
CoreOS cannot read the YAML file directly. We use the butane tool, conveniently available as a container, to transpile it into a valid JSON Ignition file.
Run the following command in the directory containing your config.bu file. This will generate the transpiled_config.ign file needed for installation.
docker run --interactive --rm --security-opt label=disable \
       --volume "${PWD}:/pwd" --workdir /pwd quay.io/coreos/butane:release \
       --pretty --strict your_config.bu > transpiled_config.ign
Step 6: Install CoreOS to Disk
From the live environment console, execute the coreos-installer command to install the OS to the virtual disk, providing the path to your Ignition file. The installation is non-interactive and will use the configuration you defined.
sudo coreos-installer install /dev/sda --ignition-file ./transpiled_config.ignAfter the installation completes, the system will automatically reboot. You can then remove the ISO from the VM’s CD/DVD drive in Proxmox to prevent it from booting back into the installer.
Step 7: Verify the Installation
Once the VM has rebooted, you should be able to SSH into it as the core user from your local machine using the private key that matches the public key you placed in the Ignition file.
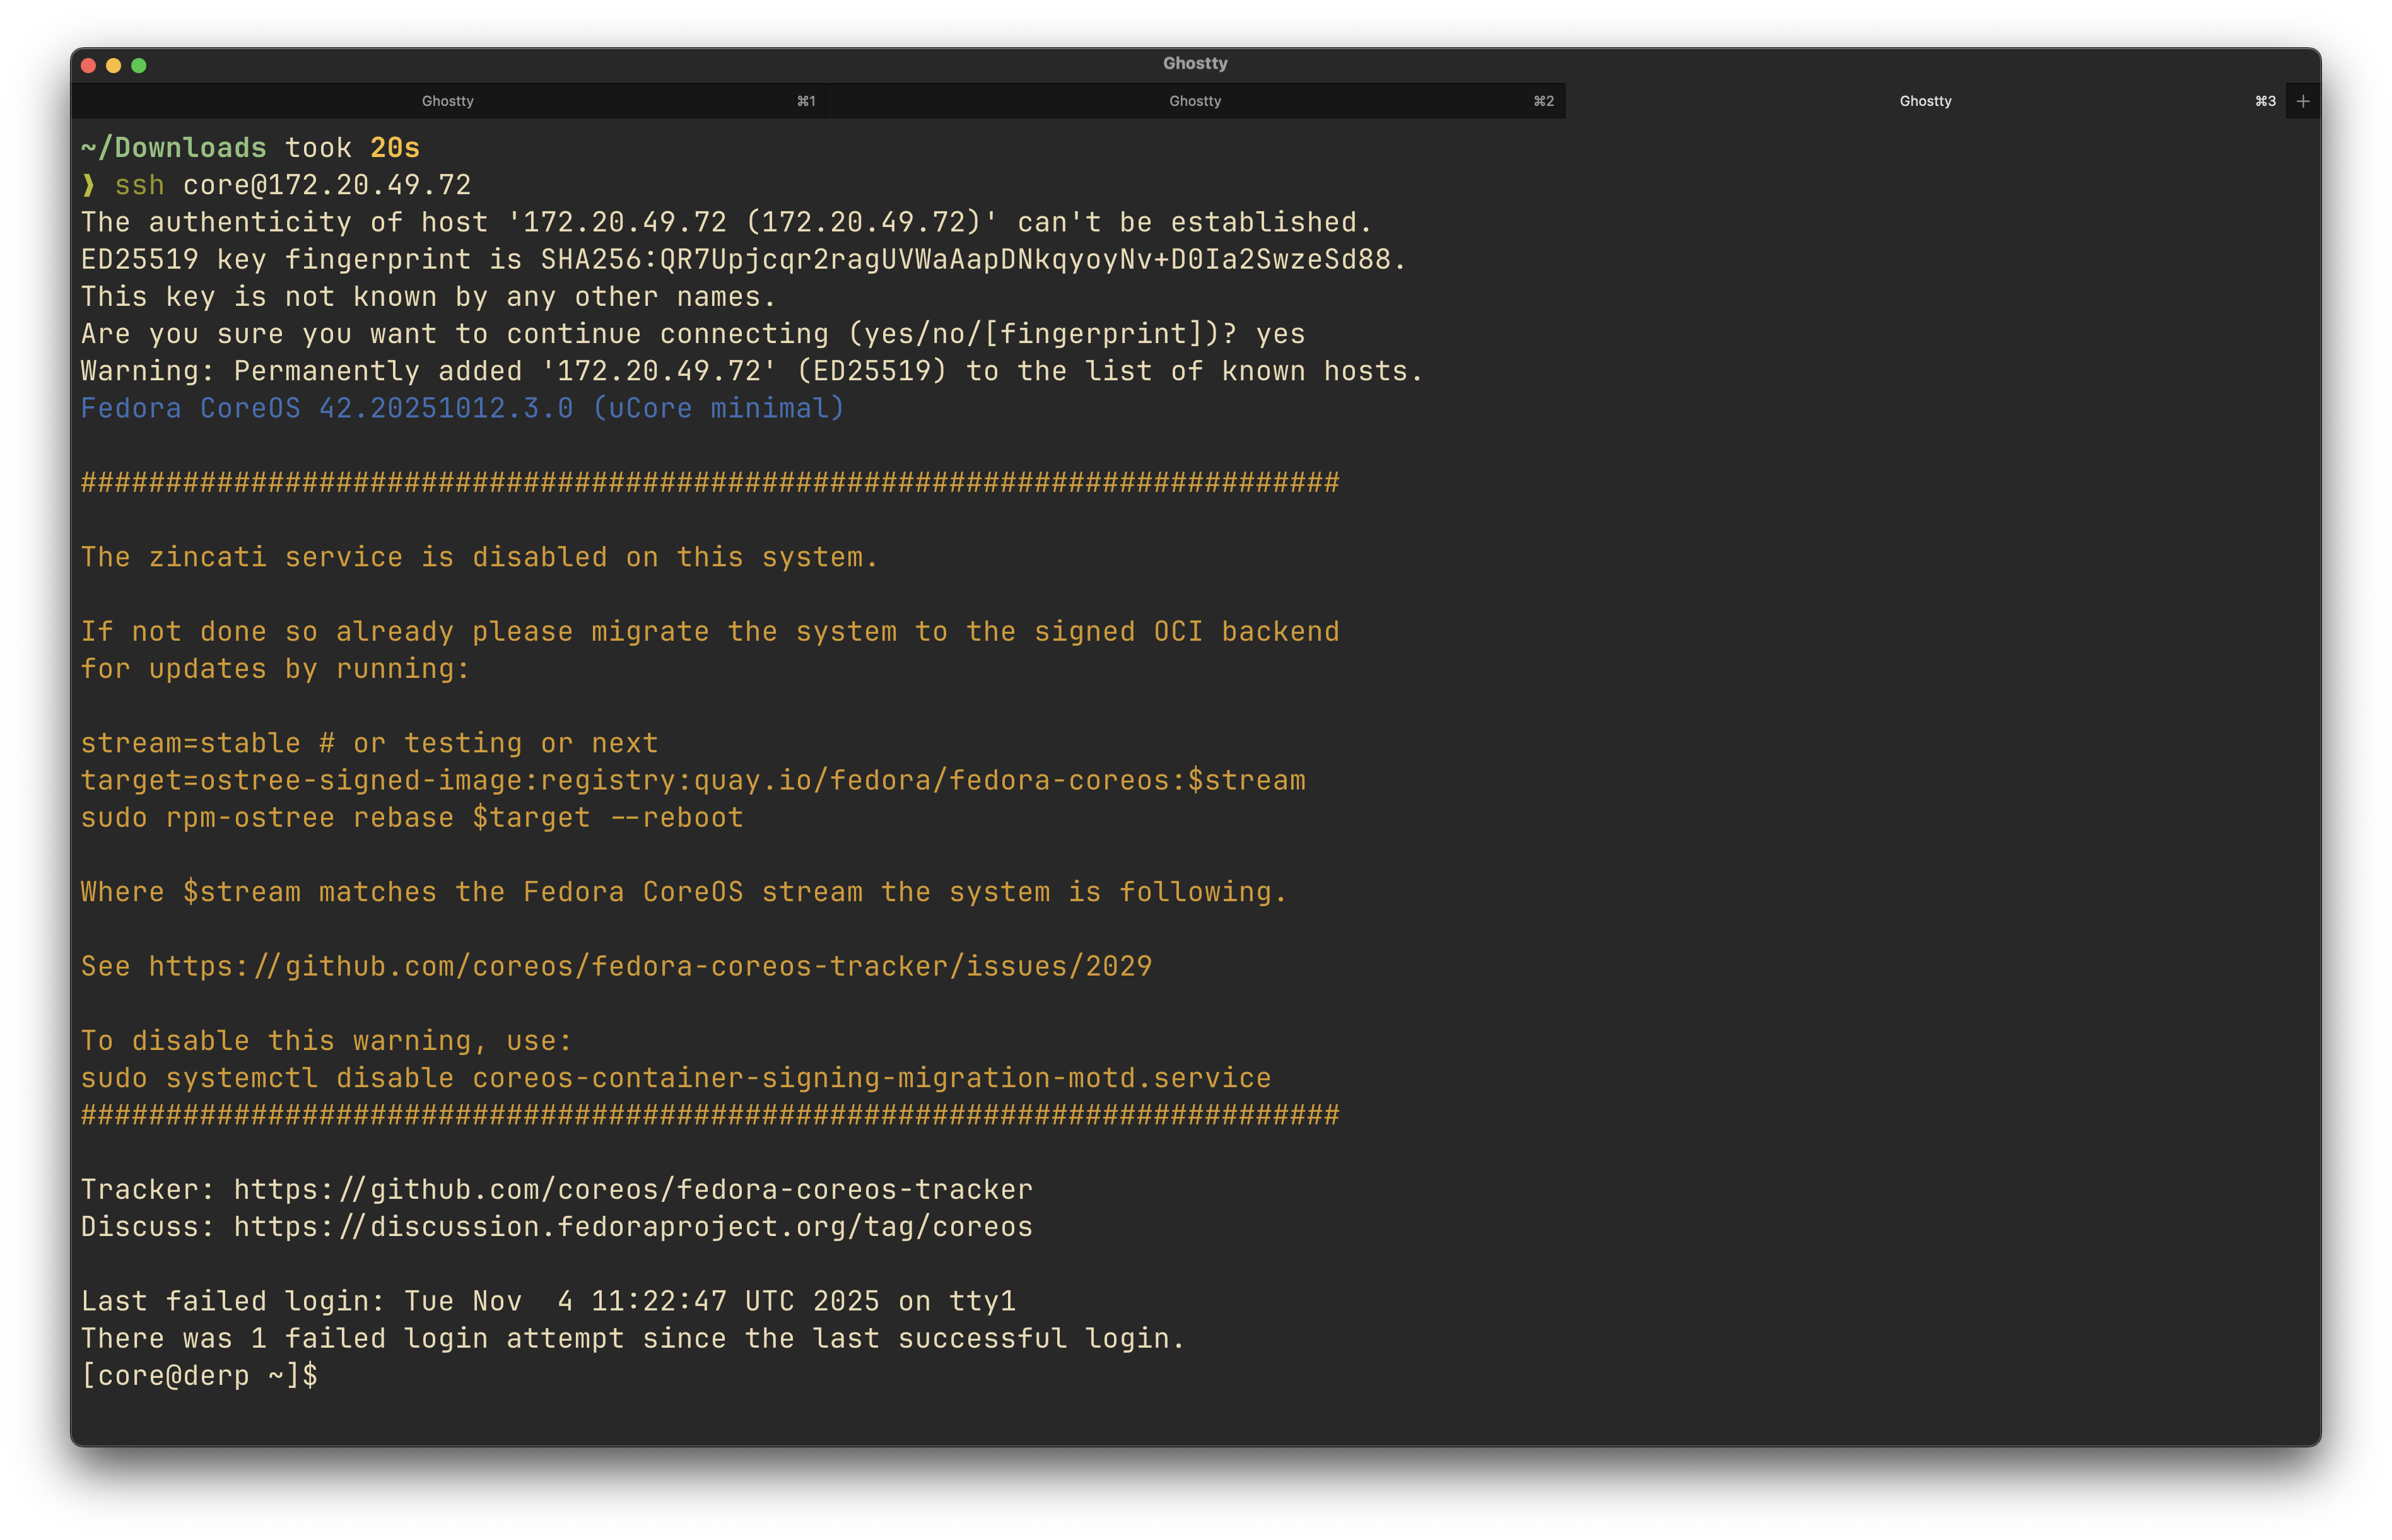
Successfully connected to the new CoreOS VM via SSH. The hostname derp confirms the Ignition config was applied correctly.
A final check confirms that Docker is installed and ready to use, thanks to the configuration in our Ignition file.
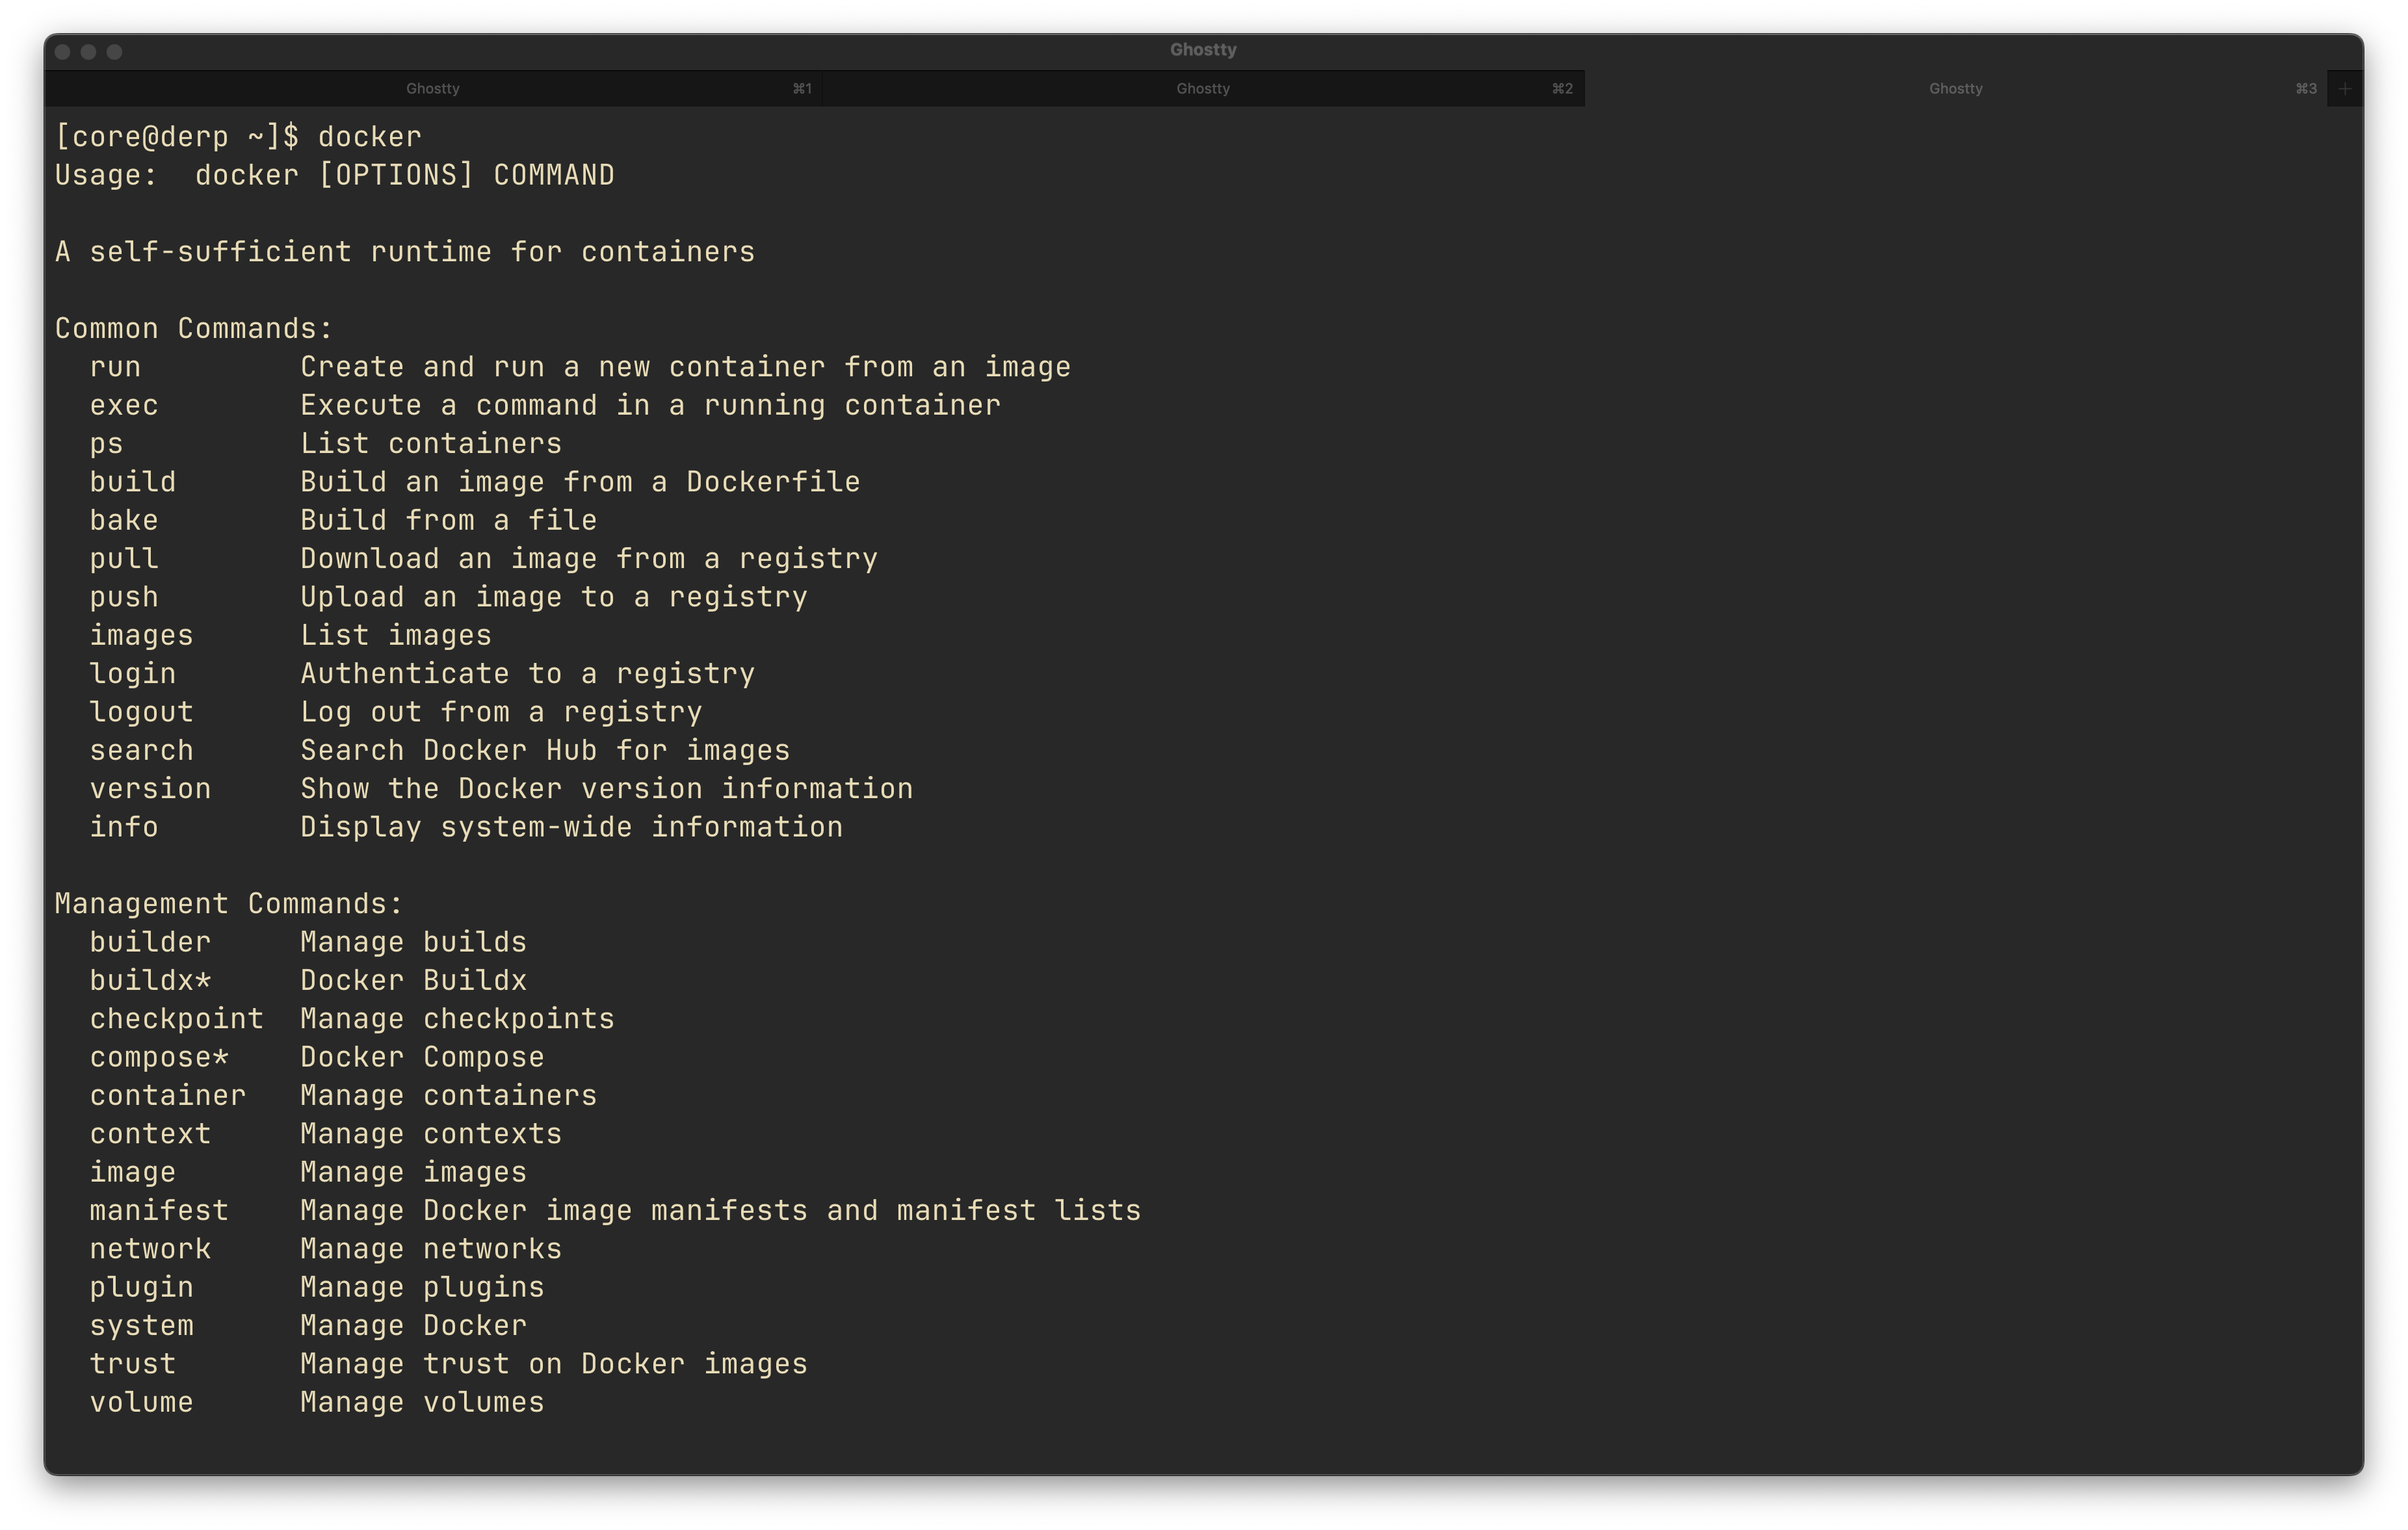
The docker --version command confirms that Docker is present and operational, allowing for immediate container deployment.